Anatomy of a Custom Bike: Rodriguez Rainier Travel

This post is part of an ongoing series profiling Rodriguez bikes that have been taken the extra mile by the customer. Today’s is a Rodriguez Rainier travel bike with impeccable aesthetics.
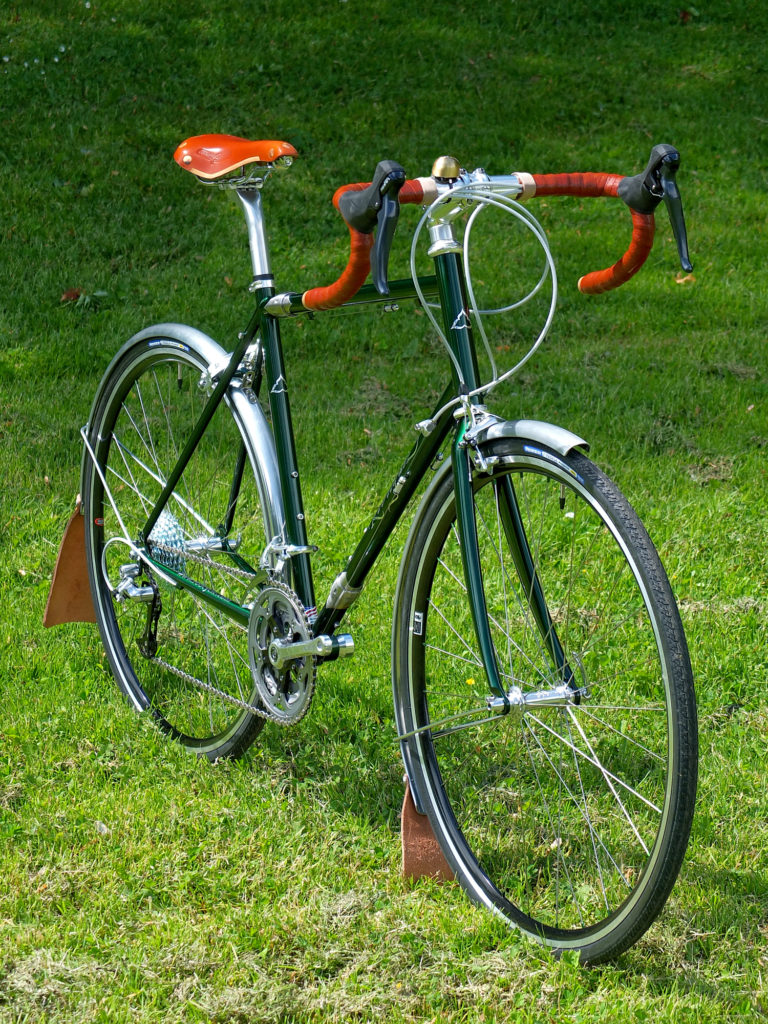
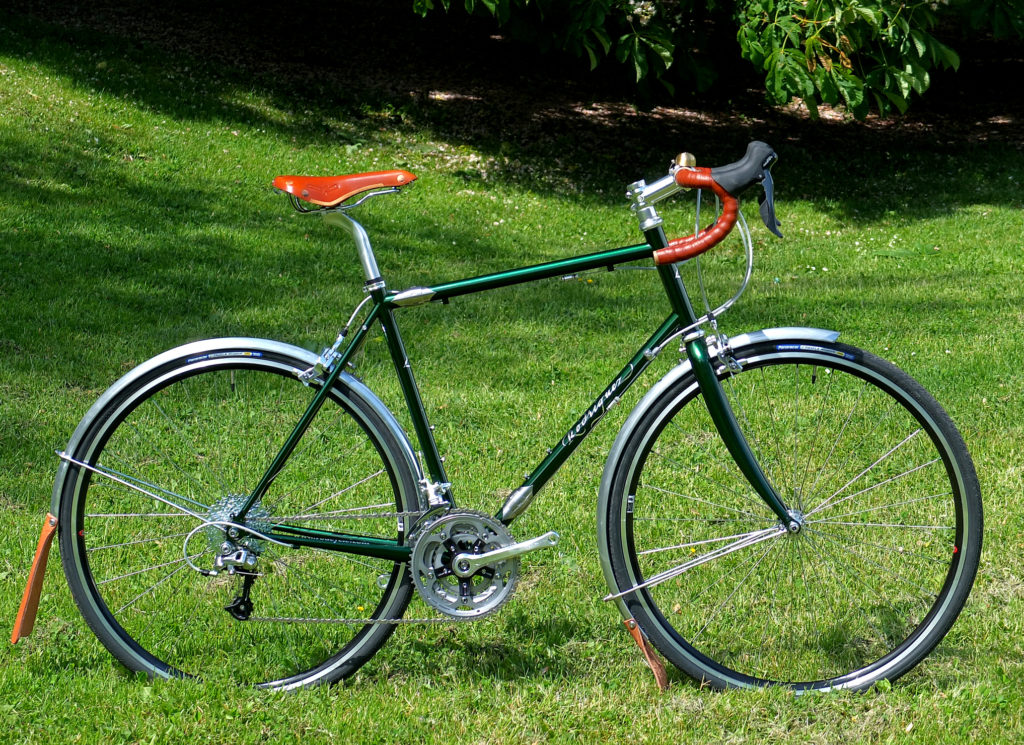
This Rainier has a gorgeous classic look

This customer had a clear aesthetic vision when they pulled the trigger on building this bike. Designed as a light touring road bike, it hits all the visual notes of a classic bike. Built with a few modern upgrades, it’s a beautiful expression of vintage bike style. As we go through the details, you can see where some compromises were made, but the overall look stayed true.

Silver parts were the order of the day

Let’s start with the drivetrain. The MicroShift derialleurs were an easy choice. They come in silver and work dependably with Shimano shifters to shift triple chainring reliably. This is also why the bike is 9 speed instead of 11. (see our post about drivetrains if you want to know more about gearing configurations) Silver parts go in and out of fashion in the bike industry and can be easy to find one year, hard the next. We’re glad companies like MicroShift help keep silver parts available for bikes like this.
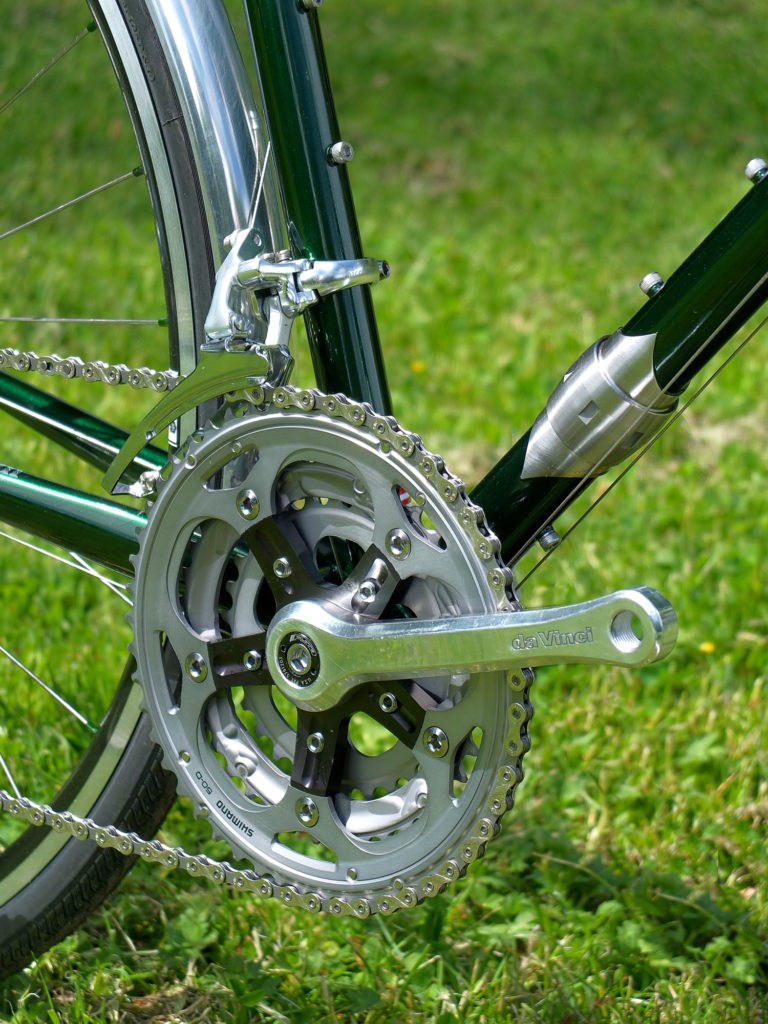
Hard to beat the look of a DaVinci crank arm

These DaVinci crank arms really round out this drivetrain configuration. When our customers want a triple crankset that’s both light and pleasing to the eye, DaVinci is our go to option. The square taper design and modular spider allow us to fine tune both Q-factor and ring spacing so that we can get everything just right for the customer and their needs.
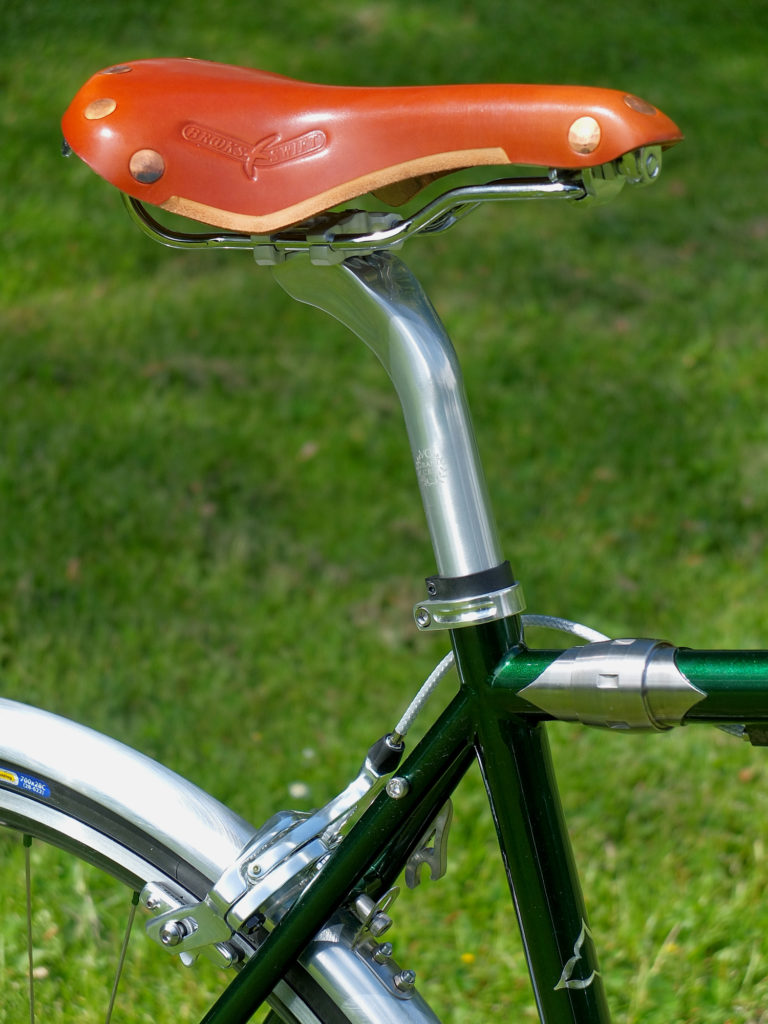
At the heart of this bike, and influencing it’s look, are the stainless steel frame couplers from S&S Machine. Not only are they essential to the travel aspect of the bike, they’re a component that meshes well visually with a classic style bike. The honey leather Brooks saddle atop a Velo Orange extra-setback seatpost are a look unto themselves. The post is essential for most riders that want a Brooks but also want a standard seat tube angle. This post gets the Brooks in exactly the right spot for most people. Velo Orange also supplied the retro style woven metallic cable housing used on the bike.

The brakes are silver Tektro R539 long reach calipers, which is our stock brake for the Rainier. Using stainless steel Sheldon Nuts to attach them gave us perfect mounting points for the Velo Orange smooth aluminum fenders. Velo Orange leather mudflaps accent the more prominent leather components of the bike while keeping the rider’s feet and friends dry.
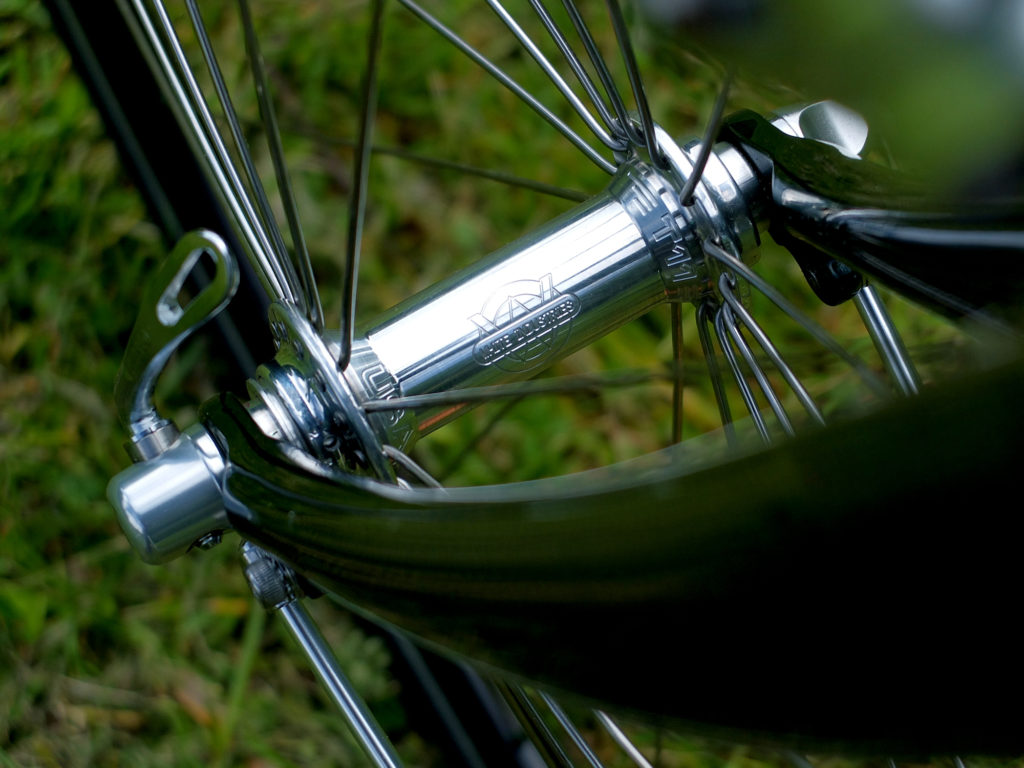
The owner chose to put a significant portion of their budget into a very lightweight set of wheels. High polish White Industries T11 road hubs laced to Stan’s Alpha 400 rims with DT Swiss butted spokes and 7075 alloy nipples. The lacing pattern is also weight saving, with a radial laced front wheel and a rear with a radial non-drive side and a two-cross drive side. The rigidity of the Stan’s rims made building with these lacing patterns a no-brainer and allowed us to build a wheelset just over 1400 grams. That weight savings made it worth the aesthetically incongruous use of a black rim instead of polished silver.

There’s also a nice weight savings with our Rainier carbon fork. While not ultra-light, our fork offers a lighter option to a steel fork with the resilience of an aluminum steer tube. Fastened with a set of the Velo Orange skewers that resemble the old Campagnolo skewers, it’s a visual package that works well.
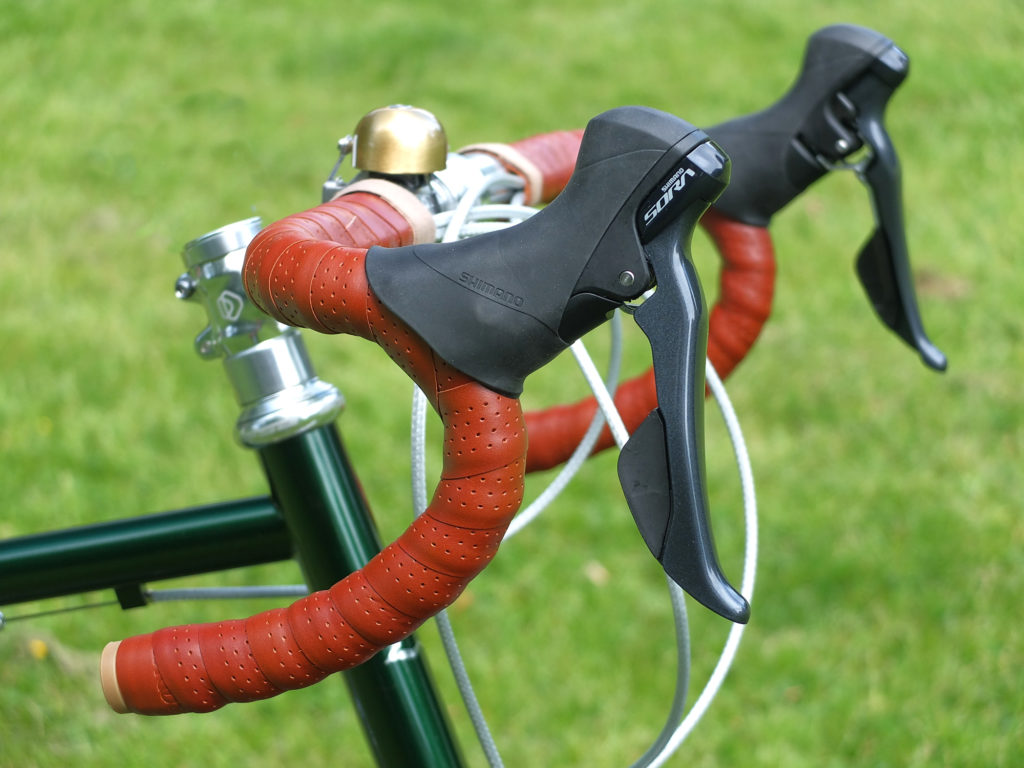
The cockpit is a mix of classic and modern styling

The handlebar setup really helps tie together the whole bike. The black Shimano Sora shifters, honey leather Brooks tape, and silver Soma HWY One bars work as color touchpoints to the rest of the bike. The Crane E-Ne brass bell is a lovely flash of gold on an otherwise silver outfitted bike. These shifters were chosen for their ability to shift a triple, but ended up working visually with the bike. They match nicely with the black rims that would otherwise look out of place.

This bike is a great lesson of how to get what you want while spending your budget where it matters the most. Helping our customers maximize their budget while still getting the bike they want is one of the skills we’re happiest to share. For the curious, here’s a complete parts list:

  • shift/brake levers – Shimano Sora 3×9
  • derailleurs – MicroShift triple
  • brakes – Tektro R539 dual-pivot caliper
  • crankset – DaVinci aluminum triple
  • chainrings – Shimano 50/39/28 triple
  • bottom bracket – Shimano UN-54 square taper
  • cog set – Shimano 11-32 9 speed
  • chain – KMC 9 speed
  • hubs – White Industries T11 road
  • rims – Stan’s No Tubes Alpha 400 700c
  • spokes – DT Swiss Competition 14/15g double butted stainless
  • nipples – DT Swiss 7075 alloy
  • tires – Panaracer Pasela PT kevlar bead
  • skewers – Velo Orange QR
  • headset – FSA Orbit X 1-1/8″
  • stem – Dimension alloy silver
  • handlebars – Soma HWY One shallow drop alloy silver
  • bar tape – Brooks leather
  • seatpost – Velo Orange extra setback silver
  • seat collar – Dimension silver
  • saddle – Brooks Swift leather
  • fork – Rodriguez Rainier long reach carbon – custom painted
  • fenders – Velo Orange smooth aluminum
  • couplers – S&S Machine stainless
  • cables and housing – Velo Orange metallic braid
  • cable splitters – DaVinci
  • bell – Crane E-Ne brass
  • mud flaps – Velo Orange leather

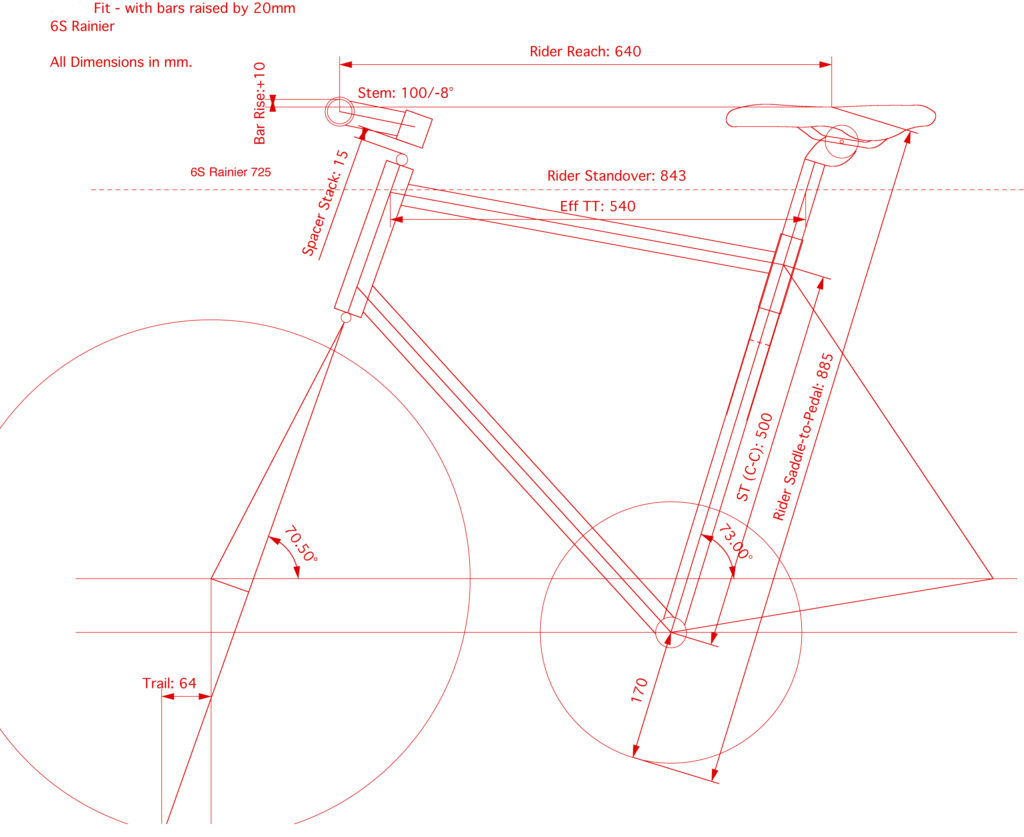
For the really curious, here’s the fit drawing:
We’d also like to thank Sockeye Cycle in Haines, Alaska for connecting us with this customer. If you’re looking to ride Alaska, they’re a great place to start.

Anatomy of a Custom Bike

What really makes a bike custom? Sometimes it’s the geometry. Sometimes it’s a special paint job. Sometimes, though, it’s literally everything. Some customers come to us with a good idea of what components they want, how they want the bike to handle under specific conditions, and what overall aesthetic they’re aiming for. These kind of customers want to make sure each component of the bike it optimized to fit their vision of the bike, and helping them fine tune their vision is one of the most satisfying parts of our job. When you help someone craft a bike that’s just right for their needs it’s a great feeling.

This blog post will be the first of many detailing the entirety of a bike like this. Not just a parts list, it will explain the logic behind each decision and hopefully serve as an inspiration for those who want to build just such a bike for themselves.

Gary’s Bandito

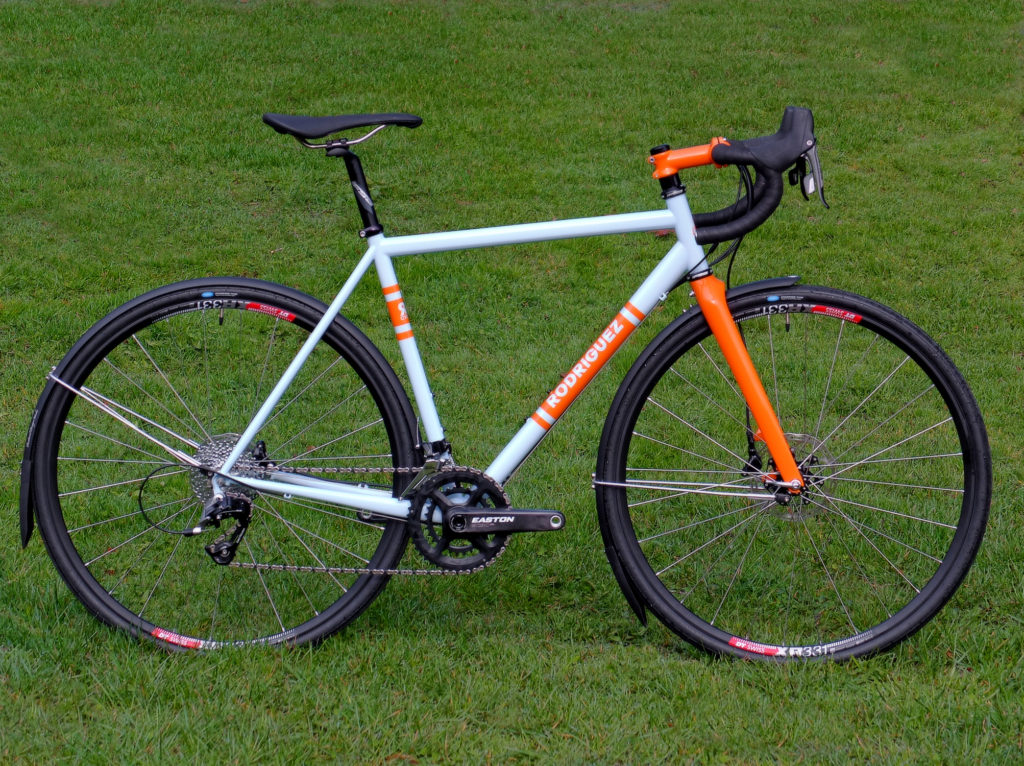
Today we’ll be taking a close look at Gary’s Bandito. Gary is a randonneur and he built this bike in large part to ride the 2019 Paris-Brest-Paris ride. For the uninitiated, that’s a 1200km (750 mile) ride that must be completed in under 90 hours. It’s the kind of ride that requires a trained athlete and a reliable bike. Gary also wanted a bike that was as gorgeous as it was functional, so it got a beautiful paint job as well. Let’s take a look at some of the details.

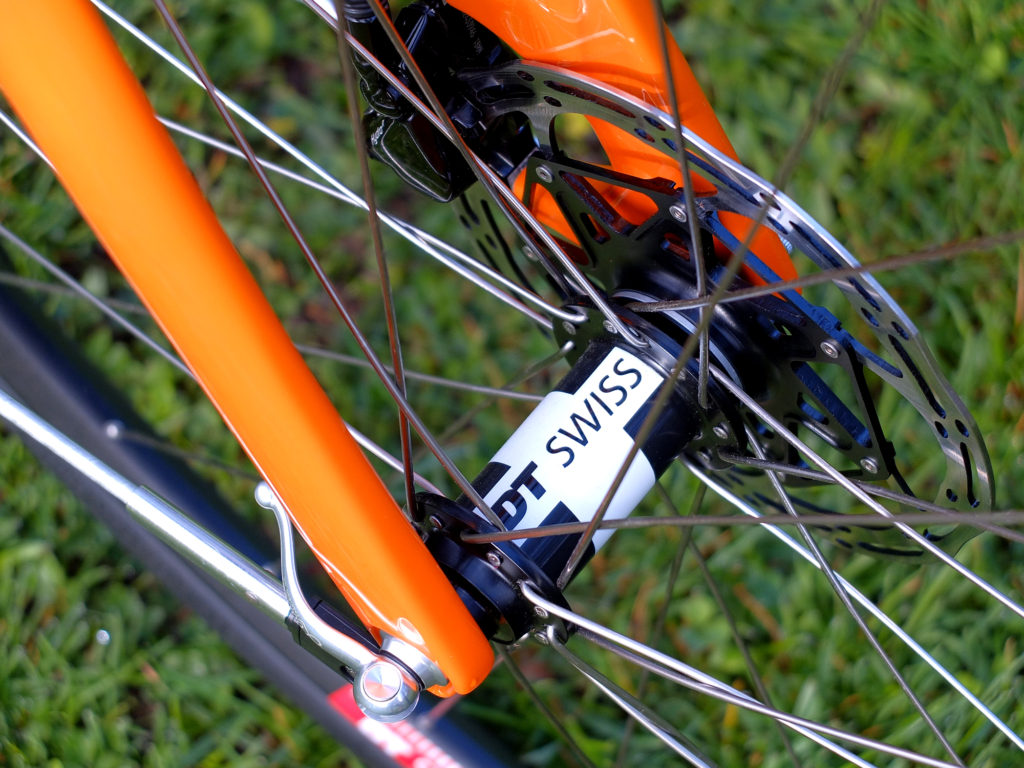
Let’s start with the wheels. Gary chose DT Swiss 180 hubs, so named because the rear hub weighs only 180 grams. These hubs come standard with high quality ceramic bearings which reduce both weight and rolling resistance. The rear hub is equipped with the DT Swiss patented Star Ratchet system freehub, which provides excellent engagement while being incredibly reliable and easy to service. These hubs may be the best combination of lightweight, reliability, and performace available. Perfect for a grueling long distance ride.

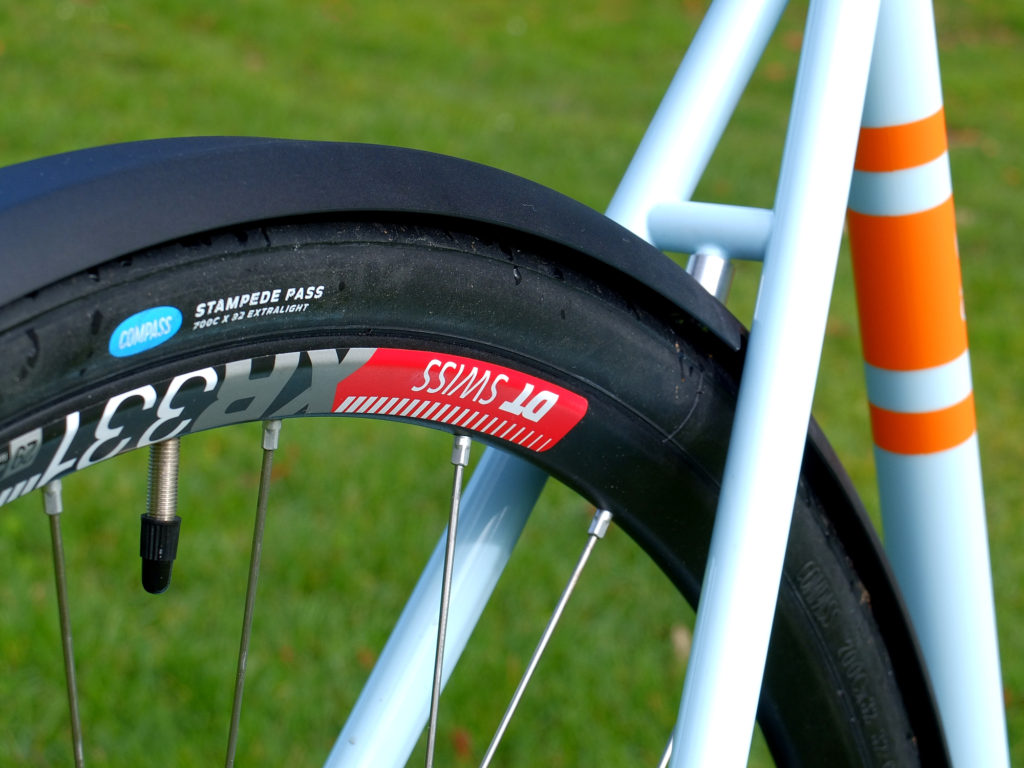
The rims are also DT Swiss. They’re the 700c XR 331 model, which is a well balanced disc-only rim that offers stiffness and strength in a lightweight package at only 380 grams per rim. The spokes are DT Swiss Competition double butted spokes with the DT Squorx nipples. Rounding out the package are a set of Compass (now Rene Herse) Stampede Pass Extralight tires. These are some of the lightest and fastest rolling clincher tires on the market and provide a famously supple ride. Overall, these wheels are very light without sacrificing durability or ride quality. They’re as light or lighter than most wheelsets with carbon rims and less expensinve. They’re also easily serviceable at any competent bike shop. They’re as close to “worry free” as a high performance wheelset gets.

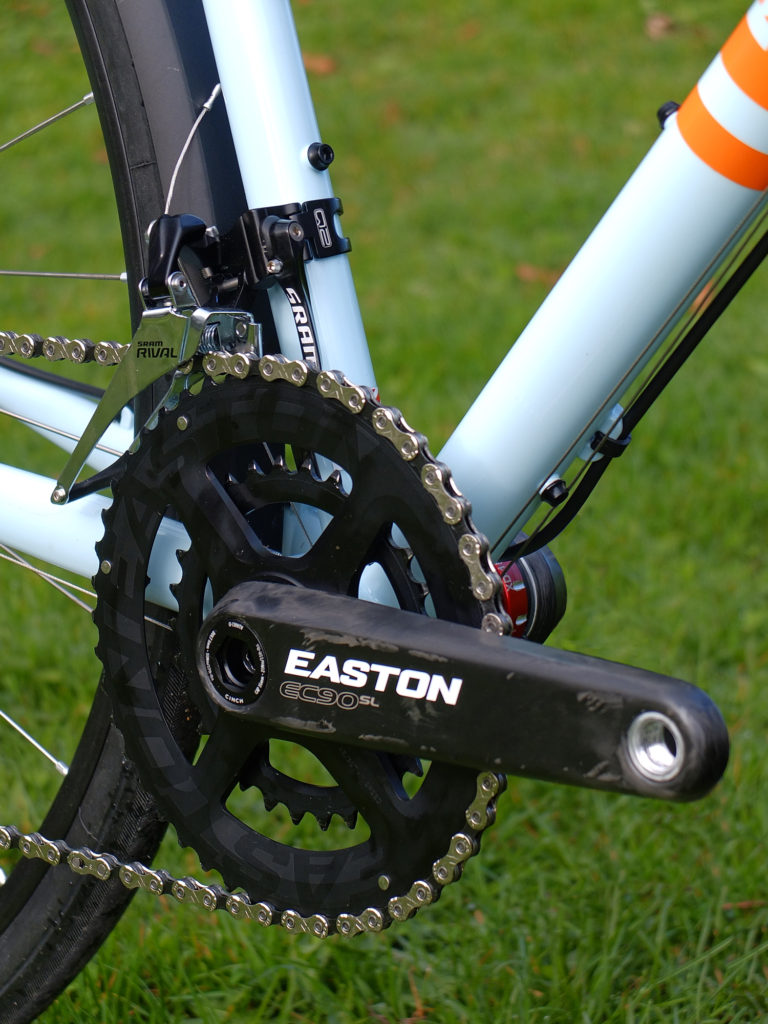
The crankset and bottom bracket on this bike follow a similar theme, combining lightness, durability, and function. The Easton EC90 SL cranks are some of the lightest and stiffest cranks on the market. Gary went with a chainring combo of 46/30, which is a popular combination for randonneurs. The real prize, however, is the bottom bracket. The Enduro TorqTite with XD-15 bearings is one of the toughest, lightest bottom brackets on the market. Ultra smooth ceramic cartridge bearings that are nearly indestructible, it holds up to heavy use and abuse.

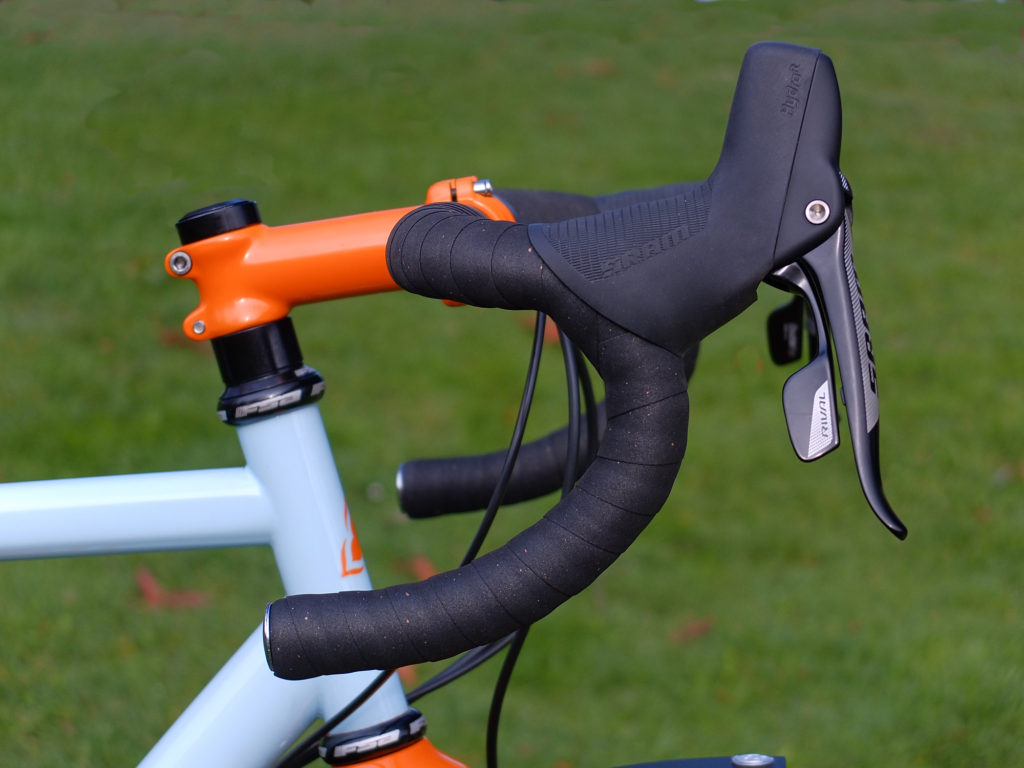
Believe it or not, this bike did not have an unlimited budget. Gary chose to save a little bit by going with Sram Rival instead of Sram Red shifters, derailleurs, and hydraulic brakes. This saved a bit of expense with only a minor weight penalty. That same thinking led to the choice of Shimano PRO alloy handlebars and a plain alloy stem. Some of that weight was mitigated, however, by using a traditional 1-1/8″ headtube and straight steertube Whisky No7 carbon fork. This setup saves a bit of weight over a tapered headtube and matching fork. The FSA Orbit X headset weighs about the same as a Chris king but at half the price so that was an easy choice for Gary.

All of this is to complement the Rodriguez Bandito frame we built for Gary. Made of our ultralight steel tubing blend and custom fit to Gary’s measurements, it’s the perfect frame for a rider that spends long hours in the saddle. The supple ride quality of a steel frame is legendary for a reason and is still the go to choice for many serious riders. We’ve been building custom steel frames since 1973 and we’ll be happy to keep doing it well into the future.

Gary’s bike is a good example of what goes into a fully custom bike. Every piece of the puzzle was considered as to how it fit with Gary’s overall vision of the bike he wanted. When Gary wasn’t sure about a component, he was able to draw on our experience and find the right choice from his many options. This kind of project can be deeply satisfying for everyone involved and in the end, we produced the bike Gary envisioned. To us that’s a job well done. In future blog posts, we’ll look at other dream bikes and see what decisions brought them to fruition. For a full gallery of Gary’s bike, go here. You can see a full list of Gary’s parts below:

  • shift/brake levers – Sram Rival 22 hydraulic
  • derailleurs – Sram Rival 22
  • brakes – Sram Rival hydraulic
  • rotors – Sram Centerline CL 160mm front 140mm rear
  • crankset – Easton EC90 SL
  • chainrings – Sram 46/30 double
  • bottom bracket – Enduro TorqTite w/XD-15 ceramic bearings
  • cog set – Sram 11-34 11 speed
  • chain – Sram 11 speed
  • hubs – DT Swiss 180 ceramic w/11 speed freehub
  • rims – DT Swiss XR331 700c alloy
  • spokes – DT Swiss Competition 14/15g double butted stainless
  • nipples – DT Swiss Squorx
  • tires – Compass (Rene Herse) Stampede Pass Extralight 700×32
  • skewers – Loaded Xlite titanium
  • headset – FSA Orbit X 1-1/8″
  • stem – basic alloy – custom painted
  • handlebars – Shimano PRO Vibe
  • bar tape – black cork
  • seatpost – FSA Energy alloy
  • seat collar – Salsa
  • saddle – Fabric Scoop titanium
  • fork – Whisky No7 1-1/8″ straight steertube carbon – custom painted
  • fenders – Portland Design Works Full Metal Fenders Road Plus

Brake Talk: Flat Mount vs Post Mount Disc Brakes

The bike industry is an ever changing beast. Evolving technologies are always redirecting the state of bicycle performance and aesthetic. Sometimes this is a real benefit, like threadless headsets, but some things don’t hold up over time. Remember Octalink bottom brackets or U-brakes?

A more detailed article explaining the differences between flat mount and post mount can be read here

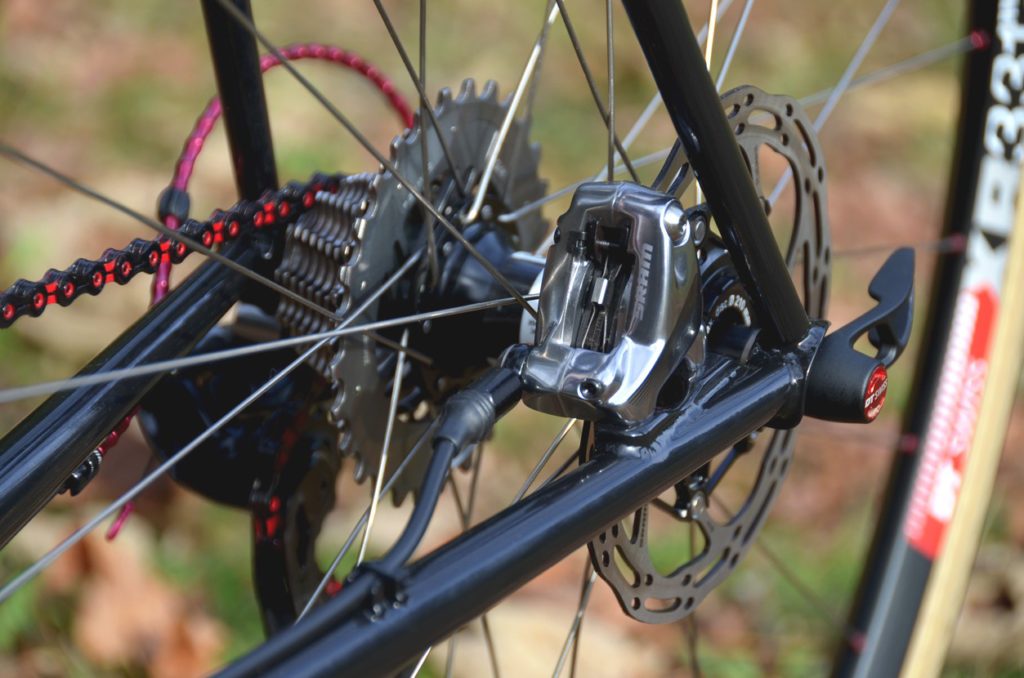
One newer piece of equipment causing some confusion is the flat mount disc brake caliper. Developed by Shimano and introduced in 2015, the flat mount caliper is supposed to be simpler and sleeker than the post mount caliper that became standard on mountain bikes. Intended for road bikes, the flat mount caliper sits directly on the chainstay or fork blade, taking up less space than a common post mount caliper. For aesthetic minimalists, mounting the brake inside the rear triangle is better looking. What are the mechanical benefits, if any?

A Sram flat mount caliper on a Rodriguez Bandito. The smaller size and less conspicuous mount allow for a more traditional rear triangle

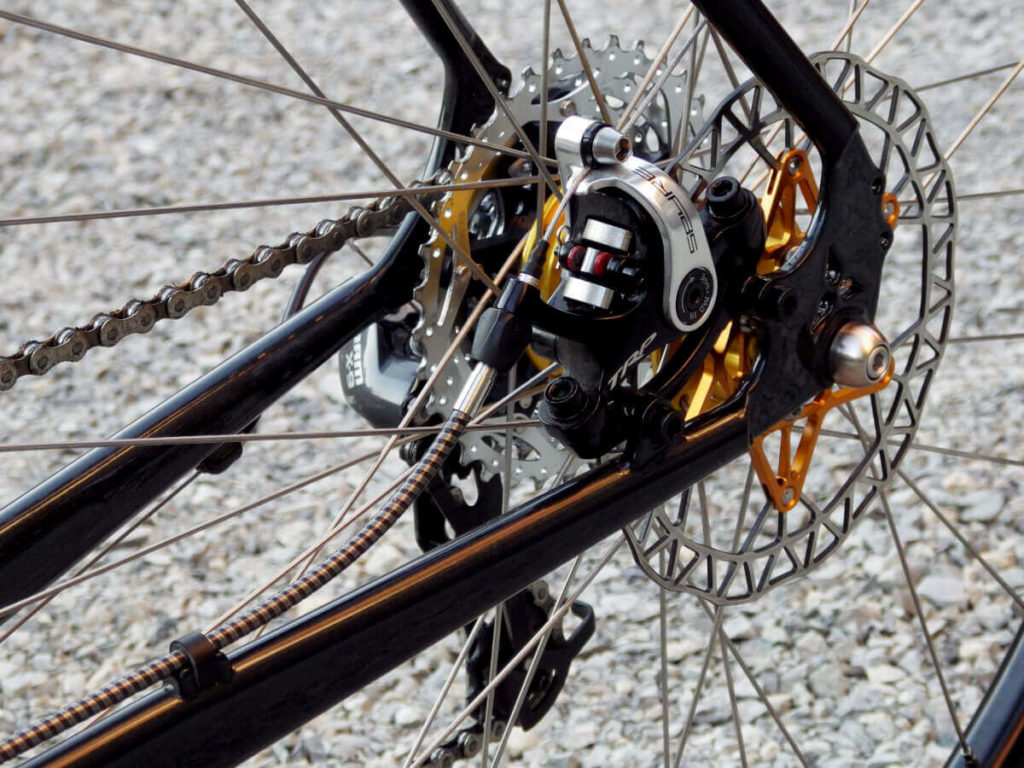
Modern disc brakes started out using IS (International Standard) mounts, often called “disc tabs”. These have two threadless holes running parallel to the hub axle that are used to mount an IS caliper or an adapter for a post mount caliper. The lack of threads meant users were less likely to damage their frames accidentally during maintenance or installation. Post mount calipers are often adapted to IS mounts because the variety of adapters allows for tremendous flexibility in rotor size. A post mount caliper affixed to an IS mount can use any rotor size between 140mm to 203mm, depending on the adapter used.

Post mount calipers, like this TRP Spyre, require more room in the rear triangle. Note the taller dropout style that creates space for the caliper inside the rear triangle.

Flat mount calipers are designed to look cleaner. There are only two small adapters and flat mount calipers are limited to 140mm and 160mm rotors. This is reasonable since these are the standard sizes used on road bikes. Adapter plates are small and sandwiched between the caliper and the frame, saving space. There are weight savings, but they are somewhat negated by the frame and fork being beefed up to provide mounting points and withstand the braking forces incurred.

You can see these two approaches to disc brakes here at Rodriguez Bicycles. Our Phinney Ridge uses post mount calipers adapted to IS mounts for the greatest range of flexibility. Our Bandito disc road bikes have a focus on road performance and light weight and we use a flat mount caliper in the rear triangle. The Bandito often uses a post mount front brake due to limitations in fork design availability. We prefer a straight 1⅛”  headtube because of the significant weight saving it offers. However, this currently limits us to carbon forks that use post mount calipers. This is one area where we feel the weight savings is worth it.

Disc brakes have become a dominant force in modern cycling. They have opened up frames to ever wider tires and brought hydraulic braking to more riders. For those of us that ride year round in the Pacific Northwest, they have given us a reprieve from excessive rim wear caused by the wet grit that coats our wheels in the winter. While not perfect for every application, they are a technology that has proven itself a valuable option for many riders. If you’re interested in a bike with disc brakes, we’d be happy to discuss which options are right for your cycling goals.

To see more examples of Rodriguez disc brake bikes, check out the Phinney Ridge and the Bandito. The Makeshift is also available with disc brakes.

Here’s an older article about the history of disc brakes in the cycling industry from 2012.