Are Tubeless Tires for You?

One of the ongoing conversations in cycling today is whether or not you should go with tubeless tires. As usual, the answer is: “it depends”. This article will hopefully give you enough information to choose the right option for your bike as well as your riding goals.

Tubeless started in the mountain bike world in 1999 and has since moved into the gravel/randonneur arenas and even made some headway into high pressure road tires. Tubeless gave mountain bikes the ability to run lower pressures without the fear of pinch flats, gaining added traction from a softer tire. The sealant also closes small punctures before the tire could go flat. These features were attractive to riders of all stripes, as it turned out.

Note: for tubeless to work properly, the tire, rim, and rim tape must all be tubeless compatible. Some products are clearly labeled, others not so much. If you’re not sure check the company’s website, or consult your favorite local bike shop.
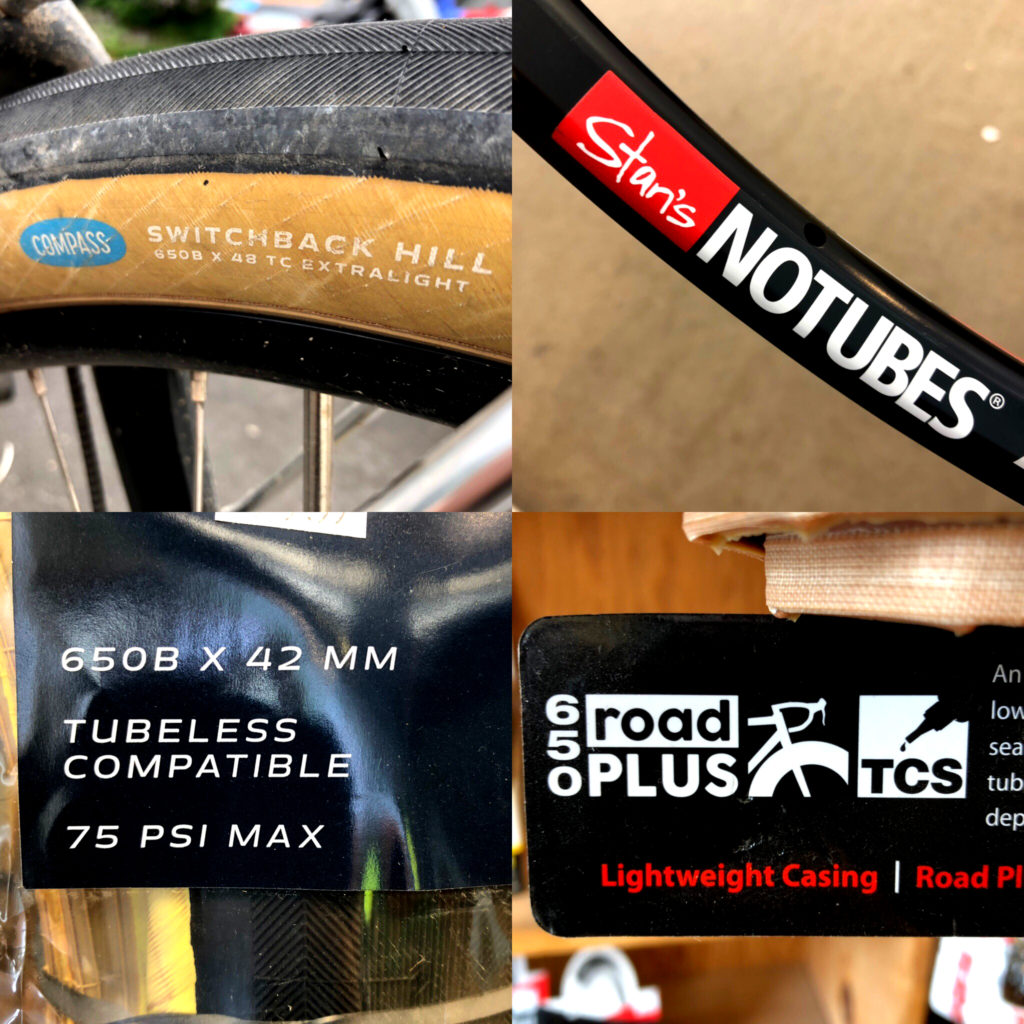
some tubeless labels are clear, others not so much

Is tubeless right for you? Let’s look at the pros and cons to find out.

Good things about tubeless:

  • Sealant means fewer flats overall – The small cuts and punctures that could stop you on a normal tire and tube setup would seal automatically. Your tire will lose some air with each puncture, but topping off your pressure is quicker and easier than a full flat repair. This means more time in the saddle and less hassle on long rides.
  • “Tuning” your tires – Tubeless gives you a greater range at which to adjust your tire pressure depending on terrain. You can start your ride on the road with a reasonably firm tire, then let air out and run soft over rough terrain. You can also do this with tubes, but tubeless allows for even lower pressures. This is especially useful with supple tires without stiff sidewall casings. Stiff casings don’t run well at lower pressures as the sidewalls tend to collapse suddenly instead of flex smoothly.
  • No more pinch flats – This mainly affects off-road riders that want a large, low pressure tire for better traction on soft surfaces. This can be a real game changer for some riders, giving extra traction on demand.
  • You can always put in a tube if you need to – If your tire gets a cut or puncture too large for the sealant, you can use a traditional tube and boot to keep riding.

Tubeless drawbacks:

  • Setup can be difficult or messy for first-timers – While there are several instructional videos on the internet, becoming skilled at tubeless setup can be a mucky endeavor. Seating the tire without a tube can be tricky, liquid latex (what most sealant is) can make a mess, and the tolerances of bead and rim tape play a more crucial role. Weeping sealant can also be an issue if your sealant isn’t shaken properly or if you’re trying to convert an already ridden tire.
  • Sharp objects can become part of your tire – Remember that tiny piece of wire you ran over 300 miles ago? Probably not, since the puncture sealed in seconds. That wire is still there, though. If you end up having to install a tube out on a ride, that wire is going to pierce your tube as soon as you inflate it. The tire must be thoroughly checked for sealant-embedded debris before installing a fresh tube.
  • Tubeless isn’t faster – While not really a drawback, it’s something to keep in mind. In tests done by inquiring minds, tires with tubes were just a tiny bit faster than tubeless. Most of us probably wouldn’t notice the difference, so unless you’re a competitive racer that lives or dies by marginal gains, it’s a bit of a non-factor.
  • Roadside repairs can be very messy – If you do have to open up a tubeless tire in the middle of a ride, it’s likely to be a wet and dirty experience. Gloves are recommended.
  • Advantages are less noticeable with high pressure, low volume tires – A two inch wide tire running at 30PSI loses a much smaller percentage of air while sealing a small puncture than a 28mm tire running at 100PSI. By the time the hole seals on a tire like that, you’ve lost enough air to necessitate pulling over to reinflate the offending tire. While there is some time savings, it’s not the seamless experience you would get from tubeless on a larger, softer tire. This makes the effort of setup seem somewhat less attractive, especially when there’s no additional speed benefit.

So, are tubeless tires in your future? Probably? The trend towards larger tires will make tubeless an attractive option for more and more people, especially those looking to combine road and off-road riding. Still, the inner tube isn’t going anywhere anytime soon. The choice will be yours. We just want to give people enough information to make the best decision for themselves, without taking a particular “side” of an issue. Good luck, and have great rides.

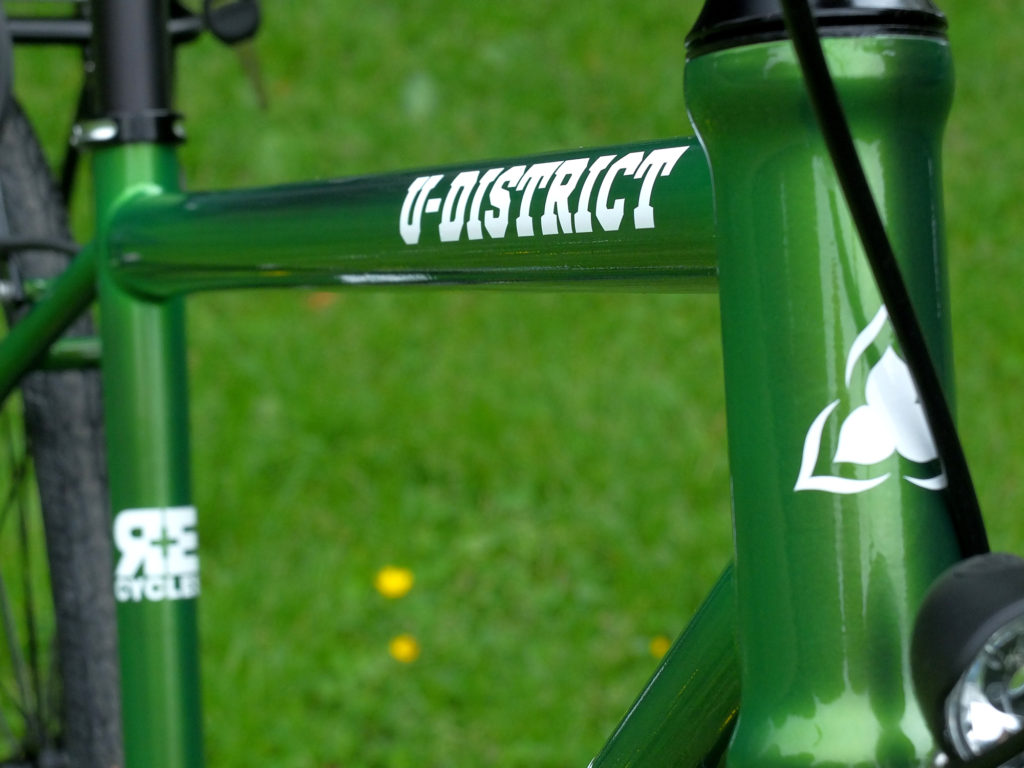
Welcome to the U-District

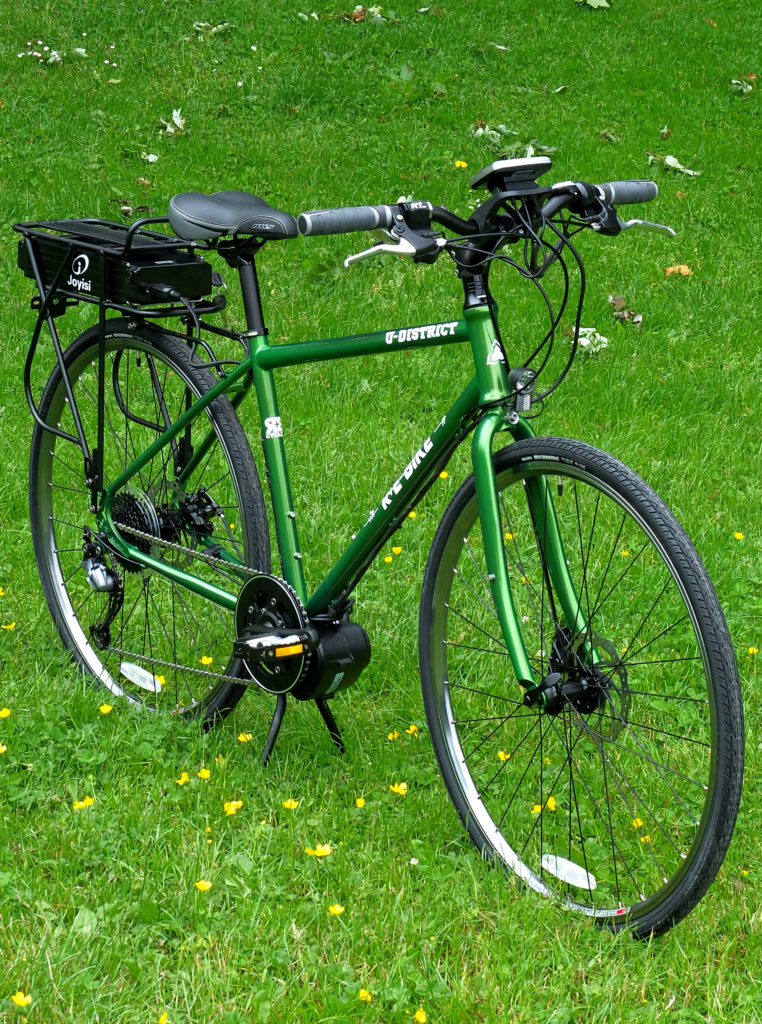
    When designing an e-bike, we knew we would give our customers what we’ve always given them: choice. We are a full custom shop, after all. After months of research, we’ve come up with three different ways to help our customers get an e-bike that works for them. Here’s a rundown of what we’ve come up with

  1. The R+E Cycles U-District

While technically our “middle of the road” option, we are probably the most excited about this one. To make a U-District, we take an existing production frame and modify it to suit the individual rider’s needs. We can add, change, or remove any braze-on as well as modify any parts that the motor might interact with. After that, it’s a fresh paint job and installing a powerful motor and battery system. This method allows us to offer  bike with an accessible price that is still flexible enough to meet your needs. This also comes with R+E’s dedication to fit and comfort. No one wants to ride a bike that doesn’t fit, no matter what kind of motor it has.

  1. A Rodriguez e-bike

A full custom Rodriguez is the only answer for those that want the most out of their bike. Every aspect is taken into consideration to meet the rider’s needs and our e-bike versions would be no different. If you have a specific vision of what you want your bike to be, a Rodriguez is the answer.

  1. A KHS Envoy e-bike

For the more budget conscious rider, we offer the KHS Envoy. It’s a way for you to get an entry level e-bike backed by our proven commitment to service and comfort. We’ve worked with KHS for decades to provide entry level bikes for our customers and they’ve produced an excellent e-bike that we’re happy to sell at our shop.

One thing we’ve learned is that the e-bike motor is still in flux. New designs are coming out often and old ones going away just as fast. Our service technicians are learning the skills to work on any of them that come down the pike. We will uphold our commitment to service no matter which way the winds blow. That’s always been our promise to customers and we don’t plan on changing.

To celebrate the introduction of our U-District e-bike, we have an introductory offer happening right now. The first ten U-District bikes we sell will go for the low introductory price of $2499.99 and you will be able to choose any single color paint job you want. These first ten won’t be available for long, so get in touch today. You can find out more about the U-District and our other e-bike options here.

Spring Checklist

Spring is in the air!

It might still be winter, technically, but we can all feel spring approaching in our bones. Now is the time to start getting ready for your 2019 summer riding season. Depending on what your plans for the summer are, there’s a lot of steps you can take now to get your season started right.

Repairs

Is your bike looking a little rough at the end of winter? Maybe it’s just been sitting since the rain started last year? Now is the time to get a head start at the repair shop. Pretty soon everyone is going to have the same idea and you’re going to end up waiting a week or two just to get some minor work done. Here’s what you should be checking for on your bike:

  • Brake pads – Are they worn out? Glazed? Misshapen?
  • Disc rotors – How thin are they getting? Are they warped?
  • Rims – Is the brake track getting worn? Is the wheel true?
  • Drivetrain – A stretched chain can ruin everything.
  • Shifting – Is it crisp and smooth? Need new cables and housing?
  • Tires – How worn are they? Is dry rot causing cracks?
  • Headset – A loose headset can cause permanent damage over time.

Upgrades

Maybe a repair is just the excuse you need to upgrade a few parts, or maybe you just want to get that shiny new set of lightweight wheels. Upgrades can be a lot of fun when it makes your bike feel fresh and new again. This is the perfect time to start picking out parts. Special orders can take a while and new wheels have to be built, so always factor in that extra time. That’s not including the actual installation process. Here are some upgrades that give good bang for the buck:

  • New wheels – This is by far the most impactful upgrade you can get. Rotational weight matters more than static weight so saving a small amount on the wheels can really change the performance of the bike.
  • New tires – Tires affect ride quality more than anything else. A light, supple tire can smooth out bumps and decrease rolling resistance. This not only makes you faster, but decreases overall fatigue.
  • Better brakes – It’s easier to go fast when you have confidence in your ability to stop. Sometimes all you need is a nicer brake pad or disc rotor to make a big difference.
  • New bar tape – It doesn’t sound like much, but some new springy bar tape with a grippy surface can both reduce hand fatigue and give your bike a nice clean look.

Check your fit

This is the one riders don’t think about until it becomes a problem. Getting a professional fitting can get your riding season started on the right foot and prevent unnecessary injuries that might keep you off the bike. If you’ve been having issues with numbness, tingling, or especially knee pain, you probably need to have your fit looked at. We’ve never heard of anyone regretting a professional fitting.

A new bike

Is it time? Is the old steed just not meeting your needs? Do you have new cycling goals that require a different type of bike? Do you just have N+1 fever? Few things match the joy of a new bike. Don’t wait until the week before that big ride you want to do. Bikes take a bit of time to break in, so keep that in mind. A handmade bike from R+E takes weeks to build and that wait only gets longer as the season heats up. Let us know if you’re ready to take the plunge.

The first day of Spring is less than three weeks away and time gets away from all of us. Summer will be over before you know it. Make those plans. Map that ride. Schedule those cycling trips. Get that bike ready. We’re here to help with you any way we can so give us a call or come by the shop. We’ll be here.

Some articles and links that might help:


Are Dynamo Hubs For You?

The dynamo hub has made a resurgence over the past decade. For those unfamiliar, a dynamo hub is a hub that uses a small internal generator to produce electricity as the bicycle wheel rotates. This electricity powers a light system and can charge a small electronic device with the right setup. Advances in magnet technology and the rise of efficient LED bulbs have made dynamo hubs smaller, lighter and more effective than ever before. Quality hubs are being made by Schmidt, Shimano, Shutter Precision, and others. If you’ve been considering a dynamo system, there’s never been a better time.

The three types of riders that most often use dynamo hubs are daily commuters, riders that do multi-day bike touring, and long distance Randonneur riders. For the commuter, dynamos provide a near maintenance free lighting system that they don’t have to think about. It’s just always there, never needing charging or fresh batteries. You can grab your bike and go with one less thing to worry about. Touring riders use their dynamos as a charging station that keeps their devices charged no matter how many days they’re on tour. Very handy when you’re using GPS as your guide or your phone is your only connection to civilization. Randonneurs can’t afford to have a light battery die in the middle of a 1200km ride so the dynamo hub system gives them a reliable, battery-free system they can depend on for the long haul.

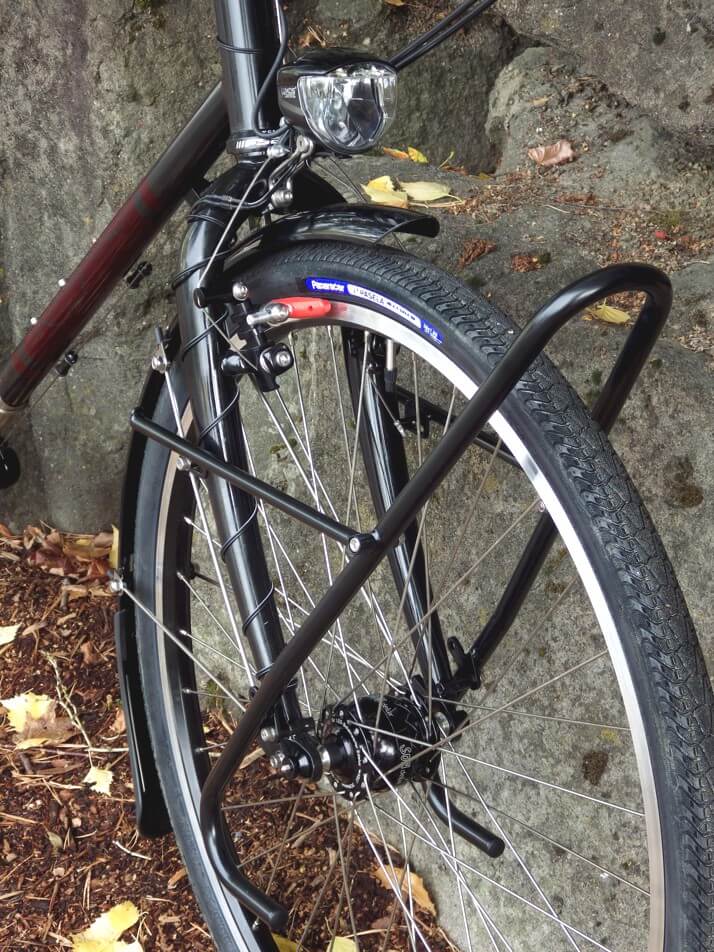
This system with a Schmidt SON Delux hub and B+M Luxos U headlight provides both light and charging capability

There are some trade-offs for all of this convenience and reliability. Cost is one factor. The high end systems can be quite expensive, but there are entry level hubs and lights available as well. You must have a dedicated wheel built for the dynamo hub itself, then lights and wiring must be installed. While not terribly difficult, setting up the system can be time consuming. Adding a USB charger into the mix can add cost and complexity, depending on how you choose to do it. The good news is that you only have to do it once. There’s also a bit of a weight penalty, since dynamo hubs are heavier than a standard front hub. The dynamo magnets also produce a slight amount of drag when rolling, The amount of which depends on the hub and whether the light is turned on. For example, the Shimano Alfine dynamo requires 2.2 watts of additional force at 30 kph, while the Schmidt requires 1.2 watts at the same speed. That is with the light or charger turned off. Both hubs require between 6 and 7 watts when the light or charger is switched on at that speed.

Modern dynamo hubs are meant to be mostly maintenance free. Manufacturers require the hubs to be serviced by professionals and hubs must be shipped to service centers. Attempting to service any dynamo hub yourself is a dicey affair. Most require proprietary tools and also have delicate electronic parts that are easily damaged by inexperienced hands. This is where the longevity of a hub comes into play. As a general rule, the higher end hubs can travel farther before problems occur. Schmidt, for example, says you should get tens of thousands of kilometers out of one of their hubs before any maintenance is required.

Much of the best bicycle lighting available comes from dynamo specific lights. Companies like Busch+Mueller, Schmidt, Supernova, and Herrmans have headlights that provide wide, evenly illuminated light fields that cover a large swath of the road ahead while not blinding oncoming riders. Compared to the focused round beams of most battery powered lights, it’s almost no contest when it comes to road visibility. You can see some nice beam comparisons here.

This is just an introduction to dynamo systems. If they interest you, we’d love to help you put a system together. Our expert mechanics can have you up and running in no time. Whether you want a reliable lighting setup, or a full charging system, we can help you select what will fit your needs best.

For further reading we recommend the following pages:

Here’s a Rodriguez with a Schmidt hub and light system

Peter White’s page is a deep well of information on dynamo systems

Cycling About has some good info about chargers

Sheldon Brown has some dynamo history

Jan Heine’s blog has lots of different posts on this subject (mostly Schmidt-centric)

Here Today, Gone Tomorrow?

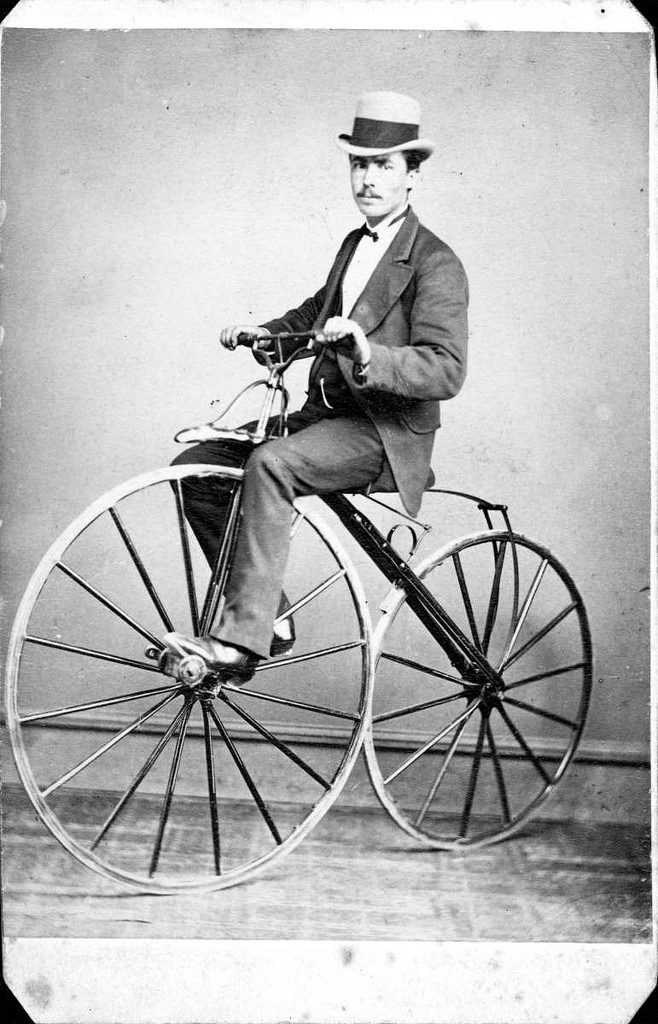
For something invented in the Victorian era, bicycles sure do change a lot from year to year. New materials, engineering advances, and the changing demands of riders keep the bicycle in a constantly evolving state. Economics can also play a role in this, for good or ill. Bicycle manufacturers need to sell bikes to stay in business. This can lead to some design decisions whose sole purpose is to drive future sales. This is called planned obsolescence. The idea is that the design will be obsolete within a known time frame and the manufacturer will be there to sell you a new model just in time. You see this in lots of electronic products, like cell phones or pop stars.

How do you know the difference between an improved design versus one designed to become obsolete? This can be tricky, even for those of us doing the manufacturing. Some real advances, like hydraulic disc brakes, seem here to stay and a benefit for many riders. It gets trickier when you look at bottom bracket designs, axle standards, or headsets. Of the dozens of designs out there, which one is going to stick around? Is it the right one for our customers? Should we switch now and risk pouring resources into a passing fad? Should we stick to our current design and risk falling out of step with the industry? This is the position many small builders face regularly.

Those of us at Rodriguez like to think we have a leg up on this question. After all, we’ve seen lots of designs come and go over the years. A lot of the time we can tell if something is going to be a lasting change because we can see how it’s going to play out over time. Or it’s possible that we just think we can and we’re guessing like everyone else. The truth is probably somewhere in the middle.

The advent of carbon bicycles has thrown a lot of these questions out the window. Does it matter if the design is any good if the bicycle itself is only designed to last a few years? Those of us building in steel or titanium are often expected to use the same components as carbon race bikes even if no one has any idea if the designs are going to stick around. (For example, the new T47 threaded bottom bracket design might eventually become the accepted standard for non-carbon bikes, but it’s hard to know now how that’s going to shake out until it does.) These can be difficult decisions. Some companies avoid this question for the most part by sticking with older designs and a classic aesthetic. We build a lot of high performance bikes that use state of the art components and sometimes it’s difficult to strike the balance between longevity and cutting edge. We’ve always built our bikes to last a lifetime and we don’t want that to change. It’s part of our ethos as a company and we still make the wrong choice sometimes.

When you come to Rodriguez for a bicycle, know that we’ve considered all of these decisions quite deliberately. We will try and build you a bike that meets your needs and will keep meeting them for the long haul. In a culture of disposability, we want to be the thing that stays true, year after year.

Brake Talk: Flat Mount vs Post Mount Disc Brakes

The bike industry is an ever changing beast. Evolving technologies are always redirecting the state of bicycle performance and aesthetic. Sometimes this is a real benefit, like threadless headsets, but some things don’t hold up over time. Remember Octalink bottom brackets or U-brakes?

A more detailed article explaining the differences between flat mount and post mount can be read here

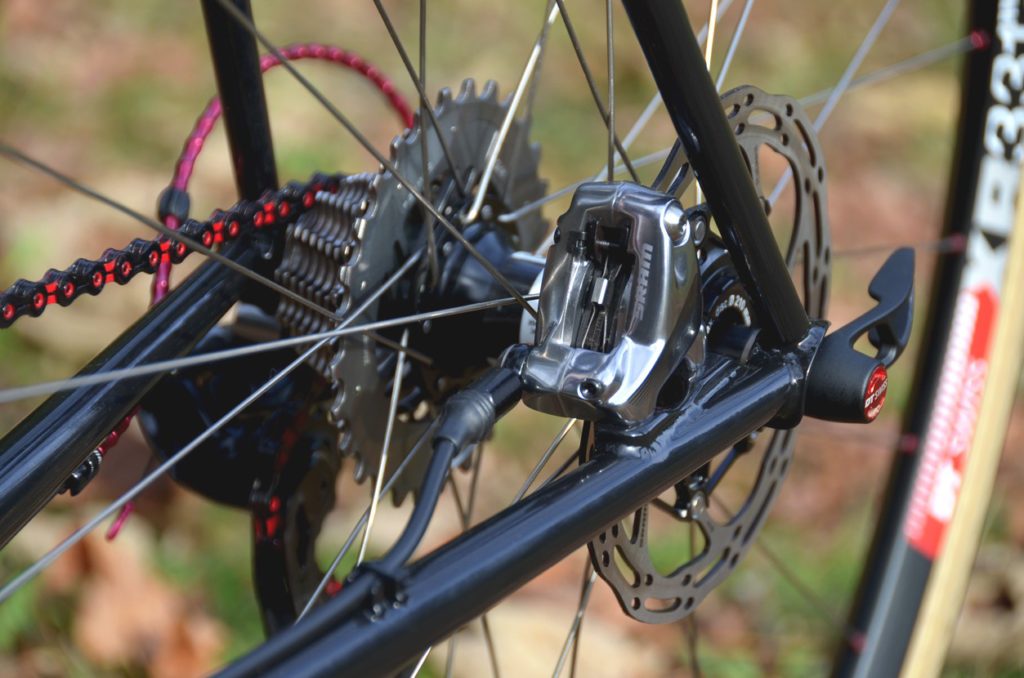
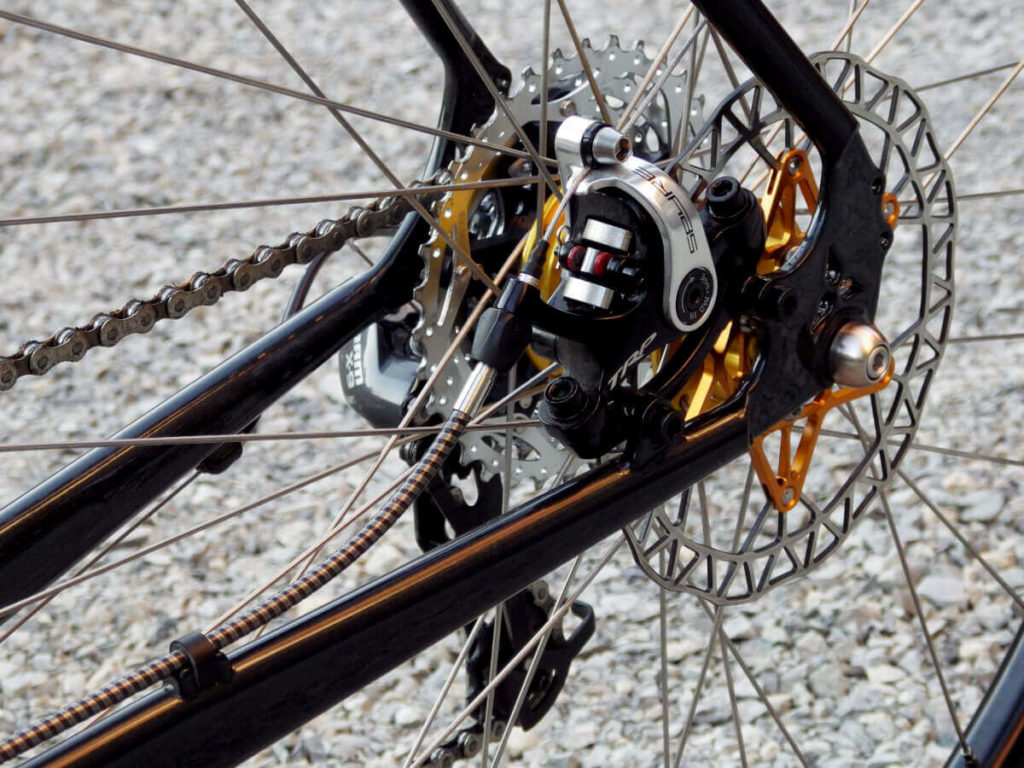
One newer piece of equipment causing some confusion is the flat mount disc brake caliper. Developed by Shimano and introduced in 2015, the flat mount caliper is supposed to be simpler and sleeker than the post mount caliper that became standard on mountain bikes. Intended for road bikes, the flat mount caliper sits directly on the chainstay or fork blade, taking up less space than a common post mount caliper. For aesthetic minimalists, mounting the brake inside the rear triangle is better looking. What are the mechanical benefits, if any?

A Sram flat mount caliper on a Rodriguez Bandito. The smaller size and less conspicuous mount allow for a more traditional rear triangle

Modern disc brakes started out using IS (International Standard) mounts, often called “disc tabs”. These have two threadless holes running parallel to the hub axle that are used to mount an IS caliper or an adapter for a post mount caliper. The lack of threads meant users were less likely to damage their frames accidentally during maintenance or installation. Post mount calipers are often adapted to IS mounts because the variety of adapters allows for tremendous flexibility in rotor size. A post mount caliper affixed to an IS mount can use any rotor size between 140mm to 203mm, depending on the adapter used.

Post mount calipers, like this TRP Spyre, require more room in the rear triangle. Note the taller dropout style that creates space for the caliper inside the rear triangle.

Flat mount calipers are designed to look cleaner. There are only two small adapters and flat mount calipers are limited to 140mm and 160mm rotors. This is reasonable since these are the standard sizes used on road bikes. Adapter plates are small and sandwiched between the caliper and the frame, saving space. There are weight savings, but they are somewhat negated by the frame and fork being beefed up to provide mounting points and withstand the braking forces incurred.

You can see these two approaches to disc brakes here at Rodriguez Bicycles. Our Phinney Ridge uses post mount calipers adapted to IS mounts for the greatest range of flexibility. Our Bandito disc road bikes have a focus on road performance and light weight and we use a flat mount caliper in the rear triangle. The Bandito often uses a post mount front brake due to limitations in fork design availability. We prefer a straight 1⅛”  headtube because of the significant weight saving it offers. However, this currently limits us to carbon forks that use post mount calipers. This is one area where we feel the weight savings is worth it.

Disc brakes have become a dominant force in modern cycling. They have opened up frames to ever wider tires and brought hydraulic braking to more riders. For those of us that ride year round in the Pacific Northwest, they have given us a reprieve from excessive rim wear caused by the wet grit that coats our wheels in the winter. While not perfect for every application, they are a technology that has proven itself a valuable option for many riders. If you’re interested in a bike with disc brakes, we’d be happy to discuss which options are right for your cycling goals.

To see more examples of Rodriguez disc brake bikes, check out the Phinney Ridge and the Bandito. The Makeshift is also available with disc brakes.

Here’s an older article about the history of disc brakes in the cycling industry from 2012.


Building Tandems the Rodriguez Way

At Rodriguez Bicycle Company, we build a lot of tandems. We’ve done it for 46 years now, and in that time we’ve learned a lot. Tandems require a different approach than single bikes. Every force put into a single bike during a ride is at least doubled, and sometimes tripled, when riding a tandem. This means every design decision has serious repercussions for ride quality as well as rider safety. In this article we are going to explain why and how we make these decisions when building a Rodriguez or Erickson tandem. We’ll take them in order of importance.


Fit – the most important decision

Every Rodriguez and Erickson tandem is built custom to the riders’ exact fit. Every one. This sets us apart from every other tandem manufacturer. We’ve learned that a tandem that isn’t comfortable to ride is a tandem that sits in the garage, unridden and unloved. Fitting one rider to one bike can be challenging, but fitting two riders to one bike requires the extra effort of a custom frame. This also allows us to build each tandem to perfectly suit the goals of each team of riders, whether that’s a 26 pound ultralight race tandem, or a double step-through tandem frame for an older (uh…wiser) couple that just wants to keep riding together as long as possible. We meet you where you need to be.

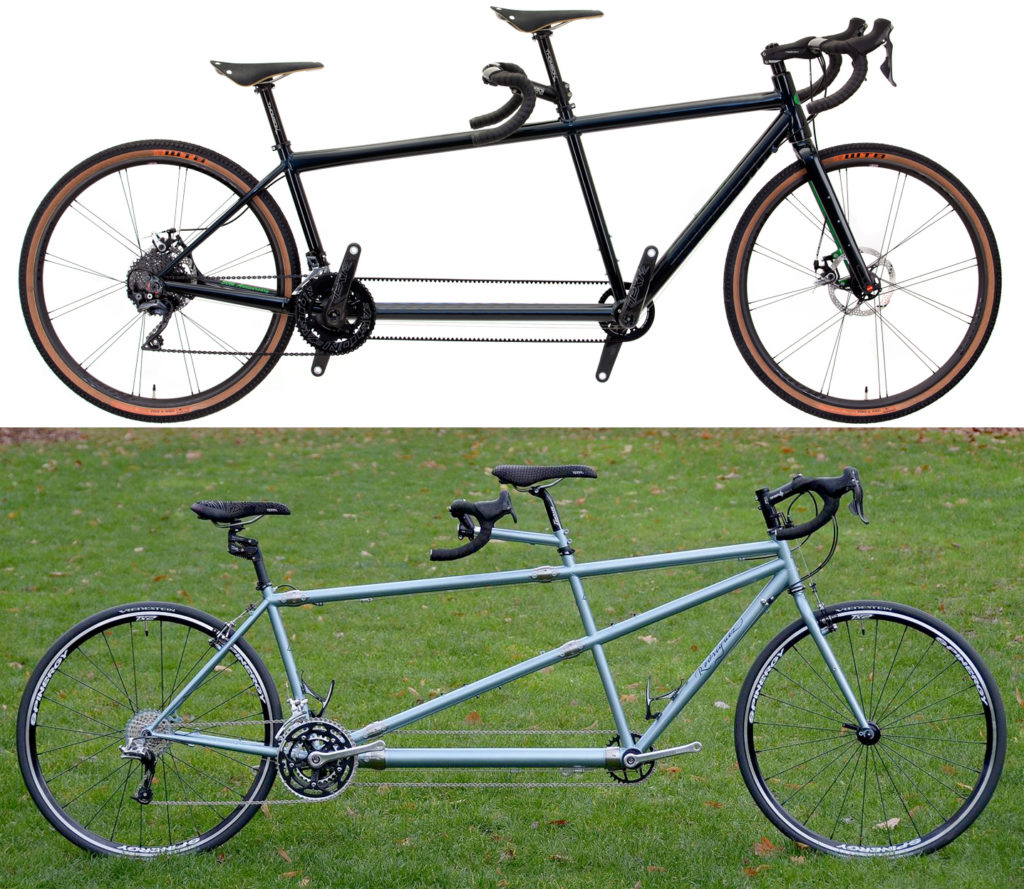
Fit is also the reason we rarely use a belt drive for our timing gears. We get a lot of questions about Gates timing belts for tandems these days. They work well to connect the two cranks together, but they are restrictive in one particular way: they drastically limit how long the stoker cockpit can be. A comfortable stoker is a happy stoker and forcing them into a cramped, short compartment is never a good idea. Although the timing belt looks cool, it will look less cool sitting in the garage because your stoker doesn’t enjoy riding the tandem.

We do build occasional tandems with belts if the stoker’s fit works out. If belts become available in variable lengths, and we can build without stoker comfort compromises, we will be happy to recommend them to more couples. Until then, consider what problem you’re trying to solve with a belt, if any, and whether the compromise is worth it.

The tandem above uses a belt for timing. As you can see the stoker’s handlebars end up almost directly under the captain’s saddle. The Rodriguez tandem on the bottom has a much roomier stoker cockpit, allowing for greater comfort and fit flexibility. Note the lack of stiffener tube in the top tandem as well.


Frame – the most permanent decision

To the untrained eye, tandem frame designs can look very similar, but to an experienced builder there are subtle yet important differences between designs. Our design choices can add complexity and time to the frame building process, but we think it’s worth it to our customers.

Designing a tandem frame is a formula that balances strength, handling, and rider comfort. The frame needs to be stiff enough to handle two riders putting all their weight and strength into it while still being compliant enough to give a smooth and comfortable ride. If a tandem is too stiff then it will be jarring to ride and therefore unridden. This is why we almost always start with steel. It provides a reliably smooth ride, fantastic strength, and can be made as light as the riders require for their needs. Desired riding characteristics can be achieved through tubing choices, tube shape, and geometry design all of which are fine tuned to the owner’s needs. These decisions build the foundation on which all the other parts rest.

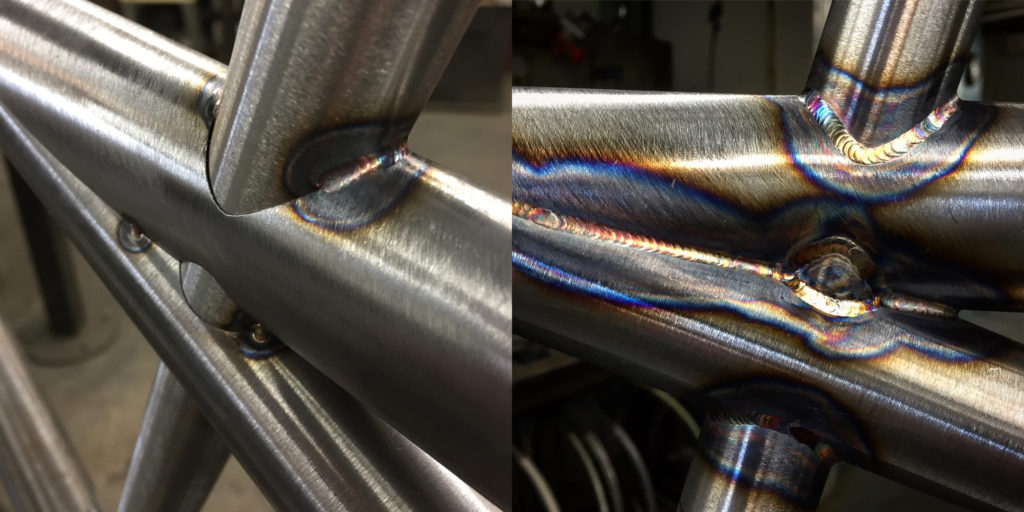
One feature that almost all of our tandems have is a stiffener tube that transverses the length of the bike from the head tube to the stoker’s bottom bracket shell. (see the above image) Correctly mitering a tube to join the bottom bracket correctly is a difficult process, but one that we know is worth it. It stiffens the frame overall, but by joining the tube directly to the bottom bracket you gain a frame resistant to the twisting forces of the stoker’s pedaling and a frame much less likely to crack from stress. Our stiffener tubes are also one continuous tube, not two tubes welded into place. (see image below) Again, this is more difficult, but worth it for the strength and stiffness this method provides. A pierced tube will not flex at the captain’s seat tube the way a pieced together tube will.

Here’s an example of a junction assembled with pierced tubes. Piercing, rather than joining two separate tubes, maintains maximum strength and rigidity.

Most tandem builders have stopped using stiffener tubes in recent years. This is to save time in their build process. Time is money, after all. Some believe it makes the frame lighter, but is that true? Surprisingly, no. All the other tubes have to made stronger and heavier in this type of design so any weight savings is negated. Leaving out the stiffener tube also results in a frame this is less resistant to flexing at the stoker’s bottom bracket. The frame will be more likely to twist under load even if the other tubes are heavier because there is no triangulation. While we do offer lower priced Rodriguez tandems without stiffeners, they are not the main choice of our customers who want a high performance build. Leaving out the stiffener saves the builder money, but there is no getting around the fact that it is a performance compromise.

Fork – critical to both handling and safety

There’s no getting around how critical the fork is to tandem riders. It needs to be stiff and it needs to be strong. We have two styles of tandem forks and both are made from steel.  Unlike a single bike, where we can use aluminum or carbon fiber forks, tandems work better with traditional steel forks. We have a heavy duty fork that can handle the weight of the riders as well as a fully loaded touring setup with panniers and frame bags. We also build a lightweight steel fork for riders that want to save weight but still have a fork that they can rely on in difficult situations like sprinting and cornering under speed. Having a fork that flexes too easily, especially in regards to the steering tube, can ruin the handling of an otherwise well built tandem.

For these reasons we no longer use or recommend carbon forks in our tandems. While many carbon forks perform well on single bikes, they have proven to perform poorly on tandems. Carbon steering tubes flex more easily and are more prone to breakage than a steel steering tube. The legs of a carbon fork have the same issue and can provide a “noodly” effect even if they are built strong enough to stay intact. There are also few carbon fork manufacturers that will warranty or recommend their forks for tandem use. They know it’s not a good idea. Even so, many tandem manufacturers put these carbon forks on their tandems even though the fork maker has specifically stated ‘not for tandem use’. If the fork manufacturer says it’s not strong enough for a tandem, you should believe them.

Safety aside, the benefits of a steel fork in both handling and reliability for tandem use greatly outweigh saving a couple of ounces of static weight.

Components – fine tuning your needs

Tandem components go through a lot. Shifting gears can be especially challenging with two people applying force to the drivetrain. Stopping a tandem requires more than 3 times as much force as a single bike, thanks to the Inverse Square Law. Wheels on a tandem need to be especially strong to hold up to the forces of cornering, climbing, and descending under two adult riders and the things they carry with them. We can carefully curate a set of components for your tandem that will meet your needs and hold up for the long haul. These choices will be part of the conversation when you get a tandem from R+E. One size does not fit all and we keep this in mind when building your tandem.

Experience – the last crucial piece

All of this information and insight comes from building and riding tandems for decades. Every part of our design has been looked and revised over the years and we are confident that we are building the best tandems in the business. We build because we ride, and we don’t want to build something we wouldn’t want to ride ourselves. If you want to know more just give us a call or shoot us an email. We will be happy to have a conversation and go into as much detail as you need.


For more information on our history with tandems, check out the articles below:

Other articles on bicycles, tandems, and the bike industry can be found here.


2019 looks great at R+E Cycles

Things are busy at R+E Cycles. 2019 has arrived with the frame shop busier than any January in recent memory. New bike sales are through the roof and we are scrambling to do all the projects we would normally have time for during the winter. This is a good problem to have, and we are thrilled to welcome so many new riders into the R+E family. We have a lot on our plate this year. Here are a few things to keep an eye out for:

  • E-Bike Evolution: E-Bikes are big these days and we only want the best for our riders that choose to go electric. There’s a lot of choices out there and our aim is to strike the best balance between performance, cost, and service. This is in addition to building a custom bicycle that’s perfect for the rider. We want you to have a bike that fits perfectly, rides well, and has parts we can service and warranty without issue. That last one has been tricky due to a constant change in the industry, but we’ve made headway towards finding options that work. If you’re interested in an E-bike, why not make it a Rodriguez E-Bike? Stop by and chat with us. We’d love to hear what your needs are.
  • Tandems Everywhere: We’re selling more tandems than ever! We’re pretty sure it’s because we build the best tandems on the market, and it looks like a lot of people out there agree. Look out for some upcoming articles about our tandem building philosophy and process, and be sure to check out our 2019 Rodriguez tandem models.
  • Bike and Pike Open House:

    Our 11th annual party is just around the corner on February 23rd. This is usually our season kick off, but the season seems here already. That’s okay, we can still have a party with some our favorite local bike-related businesses and raise a boatload of money for Food Lifeline.

  • Our Semi-Secret Project: We’ve been working on our own little development project here at R+E. This project should be of particular interest to tandem riders and anyone with difficulty shifting normal shifter configurations. We will make a formal announcement once all the pieces fall into place.
  • New Faces: We’re taking on a couple of new employees to help out with all of this stuff. Hopefully you’ll be able to come by and meet them at Bike and Pike!

This is just the start of what should be a busy year for R+E Cycles and Rodriguez Bikes. We’re riding high into our 46th year and we hope you can be part of the ride.